Showing posts with label FO. Show all posts

Thursday, August 29, 2019

Meander

I recently finished Meander by Yumiko Alexander and I'm very happy with it. My yarn for the body is Juniper Moon Farm Zooey DK and the bottom and neck trim is Classic Elite Yarns Fortuna. Both are linen blend yarns. I love this pattern -- in fact, I love quite a few of her DanDoh patterns. The designs are always easy wearing without looking frumpy. For whatever reason, the bottom edge just kept turning inwards and the top neckline edge also turned inward at the lowest point of the front neckline. So, to fix it, I decided to add a faux second layer by adding the bottom and neckline trims using a lighter weight yarn. I picked up the stitches on the inside at the base of the trim sections to enhance the look of a second layer. It's a bit warm to wear this right now, but I'm waiting for fall!

Friday, May 10, 2019

Finished at last - Olwen Cardigan

I finally finished my Olwen cardigan! This sweater took five months to knit, and I'm not sure why it took so long. The yarn is Louet Gems Sport Weight. I knitted this with a closer fit than the version shown on the pattern model. I was aiming for a slightly looser fit, but the stitch pattern gauge was hard to judge. I started it twice because the first time came out too small and I couldn't tell from the initial swatch -- I knitted about 3 inches before I could see that it was too narrow overall. I knitted the sleeves flat and seamed them up because I hate knitting small circular things. I also did the i-cord trim a little bit differently -- the i-cord wraps around both the selvedge stitches instead of being picked up in between the selvedge and the body stitches. It's a bit too warm to wear it now, but I did take it out for a spin a couple of times and so far, I'm happy with it. The yarn seems to hold its shape well.

Friday, December 21, 2018

Herbsaint sweater

It's been awhile since my last posting. Knitting has been a little slower lately. I've been busy with the holiday craft show season selling my 3D printed jewelry - Tiny Right Brain Designs, instagram @tinyrighbrain. I finished this lovely sweater not too long ago and it's gotten good wear already. The pattern is Herbsaint, a Baby Cocktails design. I don't like to knit or wear cabled sweaters, but this design has sparse cables and it's knit in a DK weight with lots of drape. I used Knit One, Crochet Too Batiste, which is one of my favorite yarns. The sweater has a nice modern feel to it with a boxy draped look. I lowered the front neckline a bit and I think I adjusted the width a tiny bit. I did make sure that the stitch patterns matched at the ends of the left and right sleeves. As far as knitting technique, I found that it was faster after a while to do the cable pattern without a cable needle. For the bottom section, I didn't bother to count stitches. I just used the same needle size and picked up two stitches for every three rows of the body and this worked out fine.

I wish all of you a happy holiday season and a great 2019!

Friday, September 21, 2018

Summer Sweater

At last - I've finished a sweater! I don't know why this sweater took so long. I think it's probably just due to less knitting time than normal. This is a pullover for the end of summer, but I'll wear it in cooler weather with a thin layer underneath. The pattern is my own design. It's a basic shape with a zigzag pattern down the center front and along the side edges of the back. The yarn is Zooey by Juniper Moon Farm, which is a great cotton/linen blend. I like this yarn, even though it's a bit splitty and my stitches always look uneven. I used some earlier to knit this sweater, and it's one of my most comfortable summer sweaters. The yarn feels great when worn and the sweater washes and dries wonderfully. I'm hoping I'll like this new sweater just as much.

This sweater has "sleeves" that are formed by just not doing any armhole decreases and leaving an opening for the arms when sewing up the sides I do have one tip for finishing these openings. I picked up the ribbing at 2 stitches for every three rows for most of the opening except for the two inches at the shoulder area. For the shoulder tops, I picked up one stitch for every two rows so that the sleeve is pulled in more at the top and doesn't poke upward, which I dislike.

Wednesday, August 29, 2018

Baby Knitting

My neighbor will become a grandmother for the 3rd time in November so I thought I would knit the upcoming baby boy some new things because after all, that's what knitters do. The sweater is from the Great Beginnings pattern, and I added some stripes. I sized it for a one-year old, I hope.

The hat is sized for a younger baby. According to various charts, it should fit a three-month old head. It's from the Tea Cozy Crown Elf Hat pattern.

Sunday, February 5, 2017

Sigma Tee

This is the Sigma Tee from summer Knitscene 2011. I used Elsebeth Lavold Hempathy, which is one of my favorite yarns for summer tops. It's very durable and comfortable in warmer weather. I wanted to add some interest to the body of the sweater so I did two rows of dropped double yarn-overs near the hem. The dropped stitch effect is not the same look as the opening from the dropped stitches at the raglan, but I liked the idea of a similar look that adds to the casual style of the sweater.

The neckline finishing is a double layer ribbed section that folds in on the inside and is sewed down at the neckline. That wasn't the original plan. I originally wanted some sort of ribbed collar that folds outward and flares out some, sort of like a narrow mini cowl neckline, but that just wasn't working so I turned the extra fabric to the inside and sewed it down.

This pattern had been in my queue for a while, and I liked it because of those raglan dropped stitches. However, after knitting it, those dropped stitches were a big problem because they caused the raglan area to stretch and grow. It was fine when I first tried on the sweater, but as time went on and the dropped stitches "settled", the underarm upper bust area got bigger and saggier and the sweater gave this look of ginormous bags hanging from my armpits. Not attractive at all. My theory is that the dropped stitches are loose and don't give any body to that area of the sweater. It might have been better with a woolen yarn, but it doesn't work with the plant fiber yarns that can stretch a garment even in the best of circumstances. I tried several fixes and the final solution was to use a crochet hook to add a series of slip stitches all along the purl bumps on the inside to all the stitches that are just outside of the dropped stitches. This tightened everything up and also prevents any further stretching. It's not perfect, but the underarm bags are much smaller andI think they look worse in the photos than in person.

The rest of the sweater has a slightly loose fit that drapes well. Let's hope the raglan area stays put so that I can get some wear out it!

Monday, December 12, 2016

Twigs and Willows Sweater

I recently finished knitting Twigs and Willows from Botanical Knits. This is a classic cardigan pattern with some nice yoke detailing. Mine is made with a small amount of negative ease for a fitted look. It is knit as flat pieces and sewn together, which is my favorite way to go. I changed the side shaping a bit to spread the bottom decreases out instead of doing them all in the ribbed section. I could have spread them out even further than I did. For the neckline finishing, I used an applied 4-stitch i-cord because I figured it would match the cabling in the yoke a bit better. For the front bands, I used needles 3 sizes smaller to create a denser fabric for the ribbing. Before the pieces were assembled, I was worried that the yoke cabling would be tight and pull in too much, but it turned out fine once the sleeves are sewn on. I did my own shaping for the sleeves, but I don't think it differed much from the pattern instructions. All in all, I'm happy with this cardigan.

Friday, October 28, 2016

Knitting: Horizontal Vertical Kimono

Thanks for your kind comments about my last sewing project. For this post, I'm returning to the normally scheduled knitting program. I finished the Horizontal Vertical Kimono sweater, which is a free pattern from Cascade. I used Valley Yarns Brimfield, which is a nice merino/silk blend that's easy to knit with and seems to wear well so far. I love this sweater. It's knit side-to-side as one piece from one front to back to the other front. Because it's knit side to side, the sweater tends to conform to the body better because of the way it stretches. You can easily adjust the length of this sweater, but row gauge is important for getting the width correct.

I only made a couple of tiny changes from the pattern. I made my armhole bands about 2.5" inches instead of 3". I also wanted to scrunch in the armholes a bit, so I picked up 6 stitches for every 7 for most of the armhole and 3 stitches for every 4 around the shoulder area. This also helps prevent the armhole band from poking upward at the shoulders. For the front bands, I picked up 11 stitches for every 12 because the double seed stitches tends to be a higher gauge than stockinette and I didn't want the front bands to flare out either.

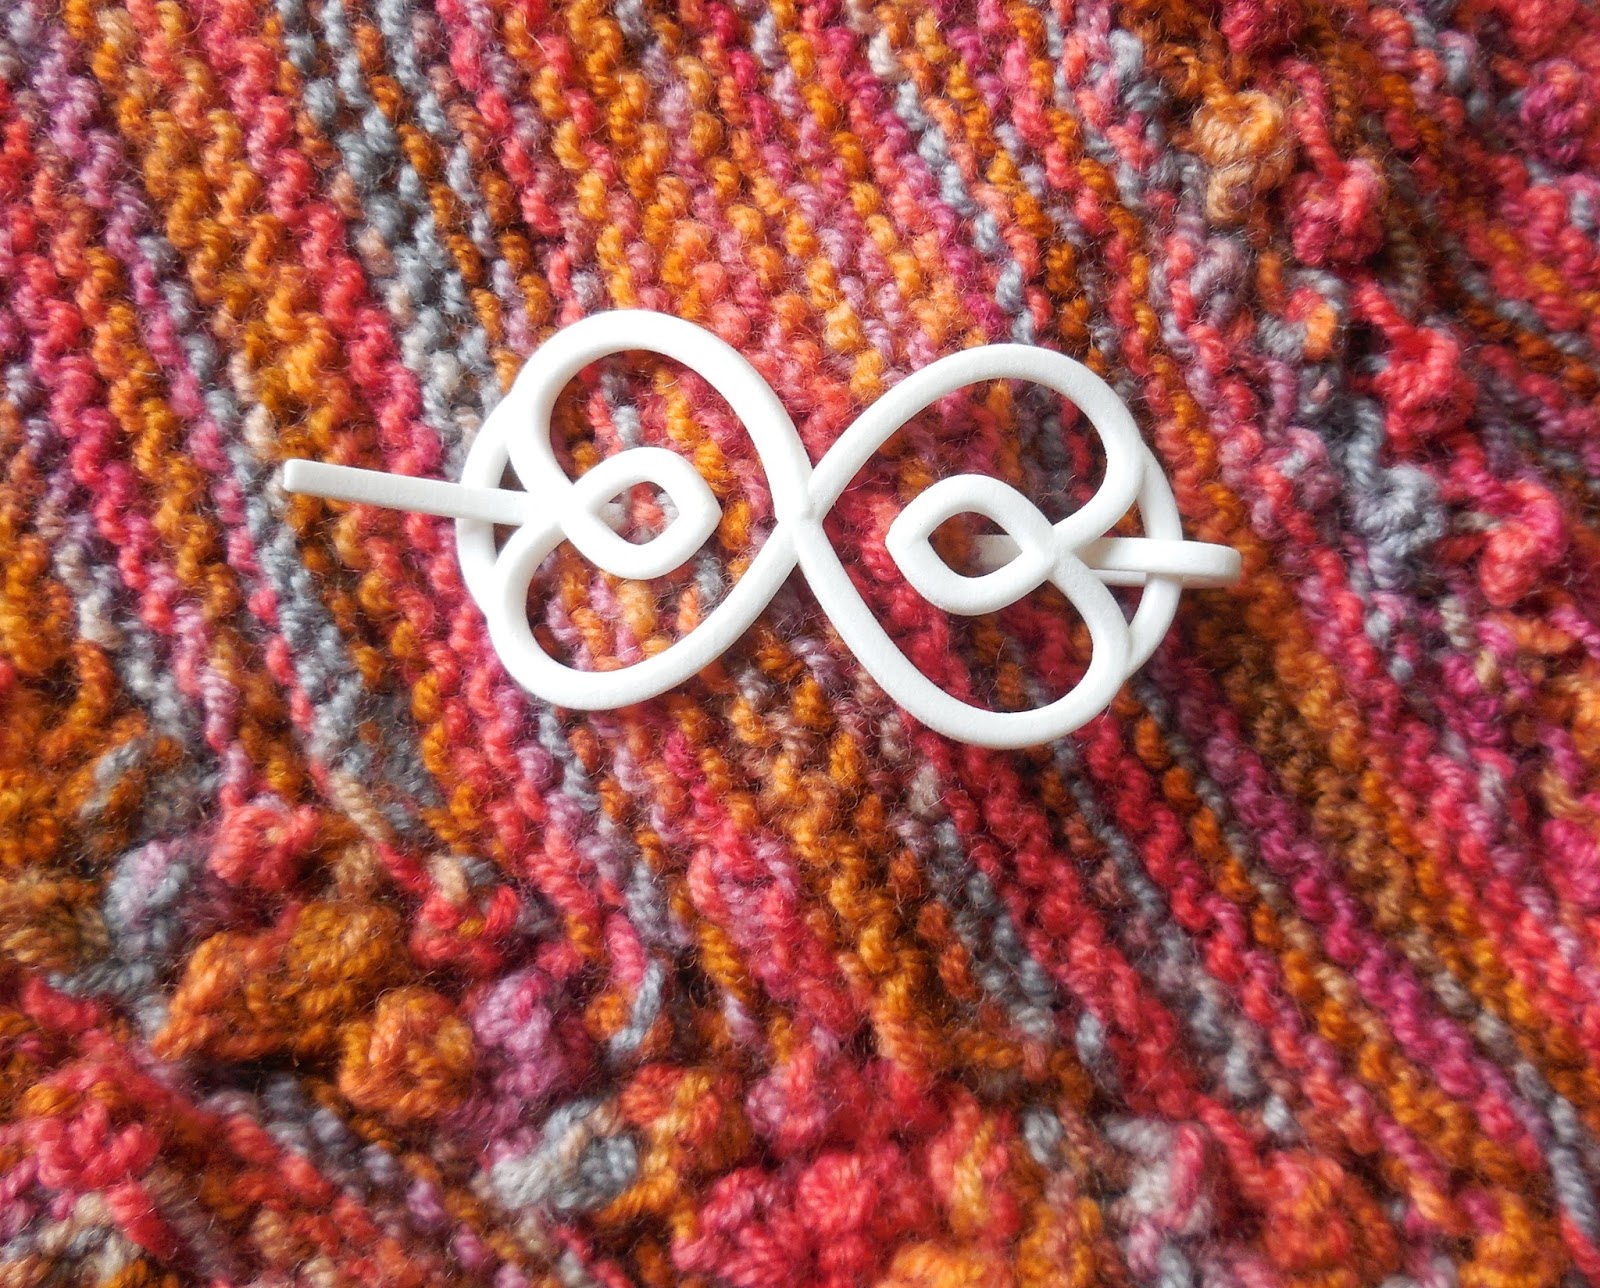
In the name of shameless advertising, if you like my shawl pin, it's 3D printed in plastic, and you can buy it here in my Etsy shop. :)

Saturday, September 10, 2016

Crossroads sweater

I finished knitting Crossroads by Yumiko Alexander. The pattern is published in her "Modern by Choice" book, which I purchased early this year at Stitches West. I was attracted to thsi pattern because of the asymmetrical hemline,which occurs naturally because of the different gauge and drape of the bottom lace pattern. The pattern calls for a fingering weight yarn, but I didn't want it that light and airy. I wanted something a little more substantial that I could wear without a second layer underneath. Wearing a second layer with a cotton/silk knit defeats the purpose of a warm weather knit. I used the DK weight Rowan Purelife Revive yarn so the sweater doesn't have an open weave. I knit the smallest size at a slightly smaller gauge. Here's a list of the other mods:

  • I knitted shorter sleeves by casting on 8, then 6 stitches at the underarms.
  • I added some shaping to the neckline since I don't love boat neck sweaters. For some reason, I don't like how they feel against my throat.
  • I used short rows to shape the shoulders and 3-needle bind-off to join them.
  • For the neckline and sleeve trims, I used a row of single crochet followed by a row of reverse single crochet.
  • I reduced my needle size by 1 (from 5 to 4) starting at the upper midriff area because I wanted it a bit smaller on top.

Saturday, August 13, 2016

Bettie's Pullover

I recently finished knitting Bettie's Pullover. The yarn is Knit One, Crochet Too Batiste, one of my favorite yarns. It's made of merino/linen/silk and very comfortable most of the year, although the higher crew neckline makes it a bit too warm for summer. It may turn out to be one of my favorite pullovers. It has a very vintage-y 40s look to it -- I call it my Bletchley Park sweater.

As usual, I made some mods from the pattern.

  • I wanted short sleeves, and I ignored the instructions for knitting and attaching sleeves as you go. They looked too complicated and I wasn't sure about the fit. I just bound off and decreased for the arm holes and knitted standard set-in sleeves.
  • I only used one needle size smaller for the lower ribbing and didn't cast on that many extra stitches. For the body shaping, I used a smaller needle size for parts of it and did side decreases for the narrowest waist section since I had stockinette stitches at the sides.
  • I aimed for a slightly wider neckline and also a slightly lower one in the front. I would have liked it lowered a bit more because I'm not a fan of high crew necklines.
  • For the neckband, I did the ends as K1P1 and converted to double knitting for the main section. The double knitting gives it a lot of body. I skipped the button hole and just sewed the button through all layers.

Monday, July 4, 2016

Anemone

.

I finished knitting this Anemone sweater shortly before the weather got warm, so I haven't really worn it much. My yarn is Katia Cotton Merino, which is 70% cotton and 30% merino. The yarn doesn't feel like cotton at all, and it's incredibly soft and warm.

As usual, I made a few changes to the pattern. I used the stitch pattern only on the front and just did the back as stockinette. I did this partly because I was lazy and partly because I wanted a less bulky sweater. I also changed the raglan ratio a bit to have more stitches on the sleeves and less on the body. I made the center stitch pattern a little narrower because I wanted more stockinette on the side in order to add some shaping. And finally, I just went with short sleeves because that's generally how I roll. I'm happy with the fit, but I'll have to have more wearing time to see how the yarn holds up in the long run.

Friday, June 17, 2016

Forest Weave Sweater

I recently finished knitting a sweater using the Forest Weave pattern. I used Cascade Ultra Pima cotton yarn, which is one of my favorite all-cotton yarns. It has really nice drape and feels very soft to knit with. I love this sweater -- it makes me feel like I should be hosting a show at an art gallery or something like that. I did make a few mods, as I usually do. I reduced the circumference by 8 inches. It is 40 inches as compared to the 48 inches for the pattern's smallest size. The sweater is knit side to side for the front and back pieces, so I reduced the number of rows and scrunched the cable pattern down by having fewer rows between the cabling rows. It still feels a smidgen too wide, but the drape seems to improve with wear, so it's looking narrower with more wearing time. I also did not knit sleeves but just added some rows of garter stitch onto the armhole opening. I did some decreases at the top to prevent the band from poking upward.

Friday, April 29, 2016

New sweater

I recently finished knitting this sweater from an improvised pattern. This is more or less a classic pullover, with a slight vintage look. It came out a smidgen shorter and a tiny bit more fitted than I wanted, and that's probably adding to the vintage effect. The yarn is Handwerks Silky Sock, which is a fingerling weight silk/merino yarn. It's the first fingerling weight sweater I've ever knitted. It didn't take as long as I expected, probably because the sweater is small and only has tiny quasi sleeves. I used most of two skeins, for a total of 870 yards.

The pattern is pretty simple. The bottom section is a broken rib, as is the neckline and sleeve edgings. The center panel is stockinette. The side panels are stockinette interspersed with 1x1 cables that shift one by stitch every other row. This sweater is shaped by increases from the bottom band up towards the underarms. I was aiming for a more dolman effect, but I didn't do enough increases as I approached the armholes section. The fit turned out fine anyway, and I really like the dressier look and feel of a fine gauge sweater. It just seem like very slow going when I'm knitting it.

Here's my tip for putting edgings on this kind of extended shoulder quasi sleeve. I picked up the stitches around the armhole at two stitches for every three rows except at the top 2.5 inches at the shoulder seam. For that area, I picked up one stitch every other row. This pulls in the top area and prevents it from poking upward at the upper arm.

Saturday, March 19, 2016

Cabled cowl with Noro yarn

A friend kindly gifted me with 4 skeins of Noro Kureyon yarn this last Christmas, purchased in Japan, no less. I've never used Noro before, so I figured a cowl is a good place to start. This one only took 2 skeins, so I can repeat the process again and try a different pattern. I adapted a cable pattern that I found in one of those 365 knitting stitches a year calendars. I used a size 10.5 needle, so it's knit at a looser than the recommended gauge. My cowl ended up about 10 inches high and 22 inches in circumference. I find that to be a good size for a cozy cowl.

For those who are interested (and also to save the data for myself), here's the pattern. I'm only listing out the main 45 pattern stitches. The cowl includes 2 garter stitches at each edge, but I won't bother typing that out.

The main stitch pattern of 45 stitches:
Row 1: k
Row 2: p
Rows 3 and 4: stockinette
Row 5: *cable 10 front, k5, repeat from * twice
Rows 6: p
Rows 7 through 12: stockinette
Row 13: *k5, cable 10 back, repeat from * twice
Row 14: p
Rows 15 and 16: stockinette
Repeat the 16 rows 8 more times.

I used a provisional cast-on so for my last repeat set, I only did 15 rows and used the kitchener stitch to weave together the first and last rows, which creates the last 16th row.
If you don't bother with the provisional cast-on, just do all 16 rows for the last set, bind off, and sew the ends together.

Wednesday, March 9, 2016

3D Printed Shawl Pins

The worlds of knitting and 3D printing collide once more with these 3D printed shawl pins that I've added to my Etsy Shop. I like to use shawl pins to fasten quite a few of my sweaters but I've always had issues with the pins I've purchased. One of my recent favorites is a large safety pin style fastener but it can get unfastened sometimes and it also has a tendency to rotate around a bit. I've used the decorative ones with a stick through a circular loop but they can come loose easily and the stick ends can be sharp. I also don't like long wooden sticks that poke out a bunch. It took a few prototypes and wearing time but I can honestly say that this pin stays on and does not rotate around or poke me in any way. It's made of plastic, which makes it really light in weight and doesn't drag down my garment. The stick is attached so I can't lose it. Now, let's see if I can sell any.....

Wednesday, February 17, 2016

Raglan Flared Sweater

I recently finished this flared raglan style cardigan, using Rowan Silk Twist. The pattern is improvised. I wanted to experiment with the placement of the raglan increases. In the standard raglan sweater, at least for me, the stitches are divided up such that when I separate the body from the sleeves, I end up with fairly fitted sleeves and a fitted bust line area. Usually this happens when the length of the slanted increases is about 8 inches. In this case, I wanted the increases to continue much further down so that the armhole would be much wider. I've seen a ready-to-wear sweater in a shop with this sort of fit and I know I've also seen a few patterns with this style. My idea was to end up with something that sort of fits like a poncho for the upper part of the body, but is much easier to wear because it has sleeves further down. I also had such success with a stand-up collar and an i-cord front with this cardigan that I wanted to try that again. I don't know if it ended up very poncho-like, but I'm very happy with the result. It's very easy to wear and the silk twist yarn is not overly warm.

This sweater is one of those one-size-fits-most sort of garments. For those who are interested, here are my rough notes on this pattern.

  • I divided the body and sleeve sections into quarters for the raglan placement. I cast on aiming for a neckline opening of about 17 inches. I did not cast on all the neckline stitches at once -- I did a few rows at the front neckline where I cast on some additional stitches so that the front neckline is lowered. I also did a couple of short rows on the back area to raise the back neckline a bit.
  • After that, it's your standard raglan increases with 8 stitches added on every round done with YOs. I stopped the increases when the raglan length was about 12 inches. At this point, I have wide armholes and the split happens way below the bust line.
  • I continued increases on the body every 4 rows for about 3 inches, then every 6 rows for about 3 inches. At that point, I changed over to a broken rib pattern for the bottom section. I did one more set of increases in the rib section about 1.5 inches in, and then just knit with straight sides to the bottom.
  • For the sleeves, I increased every 4 rows about 2 inches, then every 6 for an inch, then changed to the rib pattern and threw in one more set of increases about 1.5" into the rib.
  • The front edges are finished with a 4-stitch i-cord. The collar is knitted by picking up stitches at the neckline and then folded over and attached on the inside to give it a good stand-up look.

Thursday, January 28, 2016

3D Printed Stitch Markers

The world of knitting and 3D printing has collided and I've added 3D printed stitch markers to my Etsy Shop. These markers are colorful and ever so cute, if I may say so myself. They should be snag-free as they are printed as one piece. In case it's not obvious, the cut-out is that of a cat silhouette.

Friday, January 15, 2016

Petra Shawl of many colors

I just finished knitting the Petra Shawl. I'm not much of a shawl knitter, mainly because I don't really like to wear them. I did knit this one last year, and I actually wear it as a large scarf quite often because it's light and warm and also has bling. I knitted this latest one because I wanted to make use of this colorful ball of yarn that I bought last year. It's named Woollee, and I couldn't resist the name or the colors. The knitted end product is actually a bit more colorful than I like, but it's fine as a big scarf.

Thursday, December 24, 2015

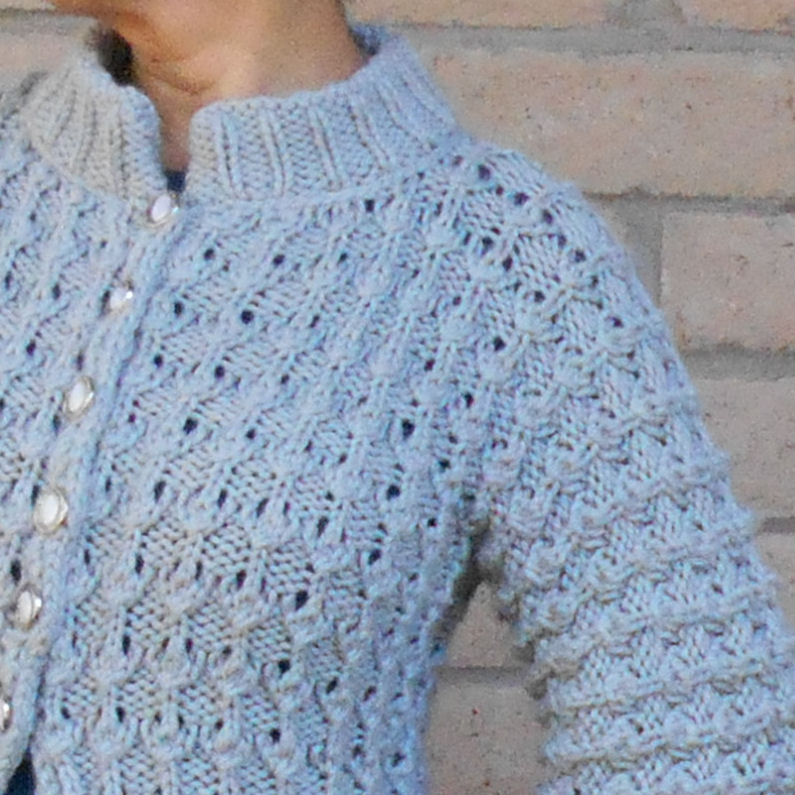
FO: Blueberry Cardigan

This is Blueberry Cardigan, knit using Valley Yarns Superwash Bulky. I absolutely love this sweater. I wasn't sure about it as I was knitting it -- the texture makes me think of some sort of alien life form in a sci-fi show and the grey is a little too much like a cement color. Now that it's done, I think it may be one of my most favorite winter sweaters. The texture looks better when worn and the sleeves remind me of the red queen -- I love the sleeves. I also love the stand-up collar, which is not in the pattern. It's knitted double-height and one half of it is folded down and sewn onto the neckline on the inside.

In addition to the collar, I made some other changes:

  • I made the neckline narrower
  • I used a 4-stitch I-cord on the fronts instead of a crochet edging. That gives a firm front and I could bury the button holes easily. The pattern calls for hook and eye closure.
  • I used a few rows of purl stitches on the sleeve openings instead of a crochet edging. I gathered in the sleeve openings also.
  • I added some waist shaping by doing some decreases from the underarms to the waist before starting the 2nd wider stitch pattern for the hips.
  • I changed the stitch pattern to a 6-row repeat instead of 4 rows. The two additional rows are just the simple ribbing, which makes the texture less puffy and also makes the sweater faster to knit.

The sweater is quite heavy because of the large amount of yarn needed due to the puffy stitch pattern. It's quite warm, and very easy and comfortable to wear.